Sunday, November 6, 2011

Risotto with Porcini Mushrooms and Marscapone with Sauteed Brussel Sprouts and Red Cabbage

So tonight I made dinner for the family and on the menu was a recipe I found off of the Cooking Light magazine. Althought this recipe isn't entirely "light" or "low-calorie" it is a far cry from the traditional risotto recipes and packs a mean flavor profile to boot :P. To complement the risotto I made sauteed brussel sprouts but decided I didn't have enough of them so added some red cabbage (what we had laying around) to the mix. The colors are beautiful and vibrant. The recipes are delicious. Give them a try sometime!!!

Risotto with Porcini Mushrooms and Marscapone

Yield: 4 servings

Ingredients:

2c boiling water
1 box beef stock (32 oz.), less sodium
1c dried porcini mushrooms (about 1 oz.)
Cooking Spray
1c uncooked Arborio rice
3/4c chopped shallots, minced
2 garlic cloves, minced
1/2c (or more) dry white wine
1/4c Parmigiano-Reggiano cheese, grated
1T fresh thyme, chopped
1/2t salt
1/2t black pepper
1/4c marscapone cheese (or 1 oz.)

Directions:

1. Begin by chopping and prepping all ingredients except do not chop the mushrooms until they are soft (see next step) and do not chop the thyme yet (it'll turn dark). Your prep should look like this:

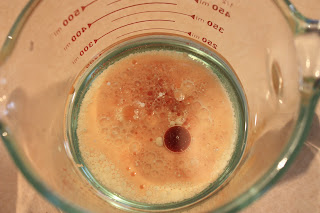
2. Combine 2 cups of boiling water and mushrooms; let stand 30 minutes or until soft. Drain mushrooms through a fine mesh sieve, reserving all the mushroom broth liquid. Chop mushrooms and set aside.
3. Bring mushroom broth liquid and all of the beef broth to a simmer in a small saucepan (do not boil or you'll cook down too much of the liquid). Keep the broth warm by keeping the heat on low.

4. Heat large saucepan over medium-high head. Coat the pan with cooking spray. Add rice, shallots, and garlic; saute 5 minutes. Add wine (you can add more than 1/2c to your liking...I used a whole mini bottle 187ml) and cook until liquid evaporates (about 2 minutes).


5. Ladle 1 cup of the broth mixture to the rice mixture and cook over medium heat about 5 minutes or until the liquied is nearly absorbed, stirring often.
(here's a picture right after you add the broth and stir)
(here's how to tell when you need to start adding more broth...when you run the back of a spoon down the middle of the pan and the broth/rice mixture doesn't automatically run back together...then it's time to add your next batch of liquid).

6. Keep adding the remaining broth mixture about 1 cup at a time until each portion of the broth mixture is absorbed before adding the next (see picture above)...it'll take about 25-30 minutes. When all your broth is added and your rice is soft add in the chopped porcini mushrooms, grated cheese, marscapone cheese chopped thyme, salt and pepper and gently stir until cheese melts. Top each serving with chopped thyme and then serve immediately.

(Note: test the texture by taking a clean spoon and eating some of the rice. If you find your rice still isn't done add more warm stock or water, depending on what you have on hand until it's cooked all the way through)


Nutritional Info per serving:
369 calories
15g fat
7.9g saturated fat
4.1g monounsaturated fat
0.6g polyunsaturated fat
11.5g protein
48g carbohydrates
4.2g fiber
39mg cholesterol
2.1mg iron
570mg sodium
115mg calcium

Sauteed Brussel Sprouts & Red Cabbage

Yield: 4 servings

Ingredients:

3T butter, salted
2c brussel sprouts, trimmed and halved
1/4 small head red cabbage, shredded into strips
1-2T water
1/4t salt
1/8t black pepper

Directions:

1. Trim the bottoms off of brussel sprouts and them sliced lengthwise (through the top of each sprout). Cut cabbage into 1/2 inch long strips.

2. Melt butter in a large skillet over medium heat. Saute brussel sprouts anc cabbage for about 3 minutes...just enough to get a little bit of color carmelized on them.
(note: If the pan gets too hot immediately take it off the heat and turn the heat down.)

3, Add water and cover with lid to steam for about 5 minutes (or until soft, check to make sure your veggies aren't burning every now and then). Season with salt and pepper and serve.
(see the little bits of carmelization in the top-right of the picture on those brussel sprouts..mmm)

Here are some of the final product pictures....enjoy!:


Thursday, November 3, 2011

Green Berry Smoothie

So I'm trying to eat healthier and also lose weight....no brainer. So I've been doing yoga for flexibility/stress release and exercise (hey...I gotta work myself up!! ;) ). Anyways, I made this green (because it's healthy) berry smoothie that has only 160 calories and tons of fiber and nutrients. It's vegan, vegetarian, gluten free etc. Here's the recipe.

P.S. Here is the picture I was promising you....basically a dark maroon "berry" sort of color.


Green Berry Smothie

Yield: 48 oz.
Servings: 3-16 oz. cups

Ingredients:
6-8c fresh spinach, loosely packed
1-2c of water (depening on how thick you like your smoothie)
2-3c frozen mixed berries (whatever type you like)
2 bananas roughly sliced

Directions:

Loosely pack spinach into blender (NOT food processor) and add about 1 cup of the water and blend until smooth. Next add the frozen berries, 1 cup at a time with a little extra water (or else your motor on your food processor will burn out and your berries won't be chopped up, they need lubricant) and blend until smooth. Continue adding the rest of the berries using the same method going 1 cup at a time and adding more water as necessary. Finally at the sliced bananas and puree until the smoothie is to your liking.

What do I use this for?? I will be using for a meal replacement. I was thinking about adding ground flax seeds to it too. You can add virtually any fruit or veggie you'd like if you want to experiment. It really ups the fiber if you add a stalk or 2 of celery (although I haven't tasted that one yet). Hope you enjoy and be good to your body. :)

Sunday, October 30, 2011

Halloween Devil's Food and Vanilla cupcakes

Today I made gluten free devil's food cupcakes and vanilla cupcakes decorated Halloween style :). I did 3 different styles; 1. is green coconut grass (coconut colored green) with festive toothpicks in it 2. Pink icing colored "brain" cupcakes with blood (red food coloring) and eyeball toothpicks on them 3. Orange swirl cupcakes with sprinkles and festive toothpicks in them. I didn't get quite as involved as I did last year on this "project" but it did basically take me all day long. I'll share the cupcakes recipes I used as well as step by step directions with picutres below.

Gluten Free Devil's Food Cupcakes

Yield: 20 cupcakes

Ingredients:
3/4c rice flour (brown or white)
1/2c sorghum flour
1/2c potato starch (or tapioca starch)
3/4t xanthan gum
1-1/2t baking soda
1/4t salt
2/3c unsweetened cocoa powder
1-1/2t vanilla extract
1-1/3c buttermilk
1/2c unsalted butter, at room temperature (1 stick)
1-1/2c sugar
2 eggs, room temperature

Directions:
Preheat oven to 375 degrees and line 20 muffin tins with liners.

Whisk the flours, xanthan gum, cocoa powder, salt and baking soda in a medium bowl.

Then, in a large bowl (or in your stand mixer), cream the butter and sugar together until light and fluffy.

Add the eggs one by one letting each be fully incorporated before adding the next.

Add the vanilla to the butter mixture.

Then, slowly alternate adding the flour mixture and buttermilk to the butter mixture just until combined and most lumps are gone.

Spoon the batter into the muffin pans filling each 2/3 full. Bake for about 20 minutes.

A toothpick inserted into the middle of one of the cupcakes should come out clean and the cupcakes should lightly spring back when you touch them. Cool cupcakes on a wire rack completely before icing.


Gluten Free Vanilla Cupcakes


Yield: 15 cupcakes

Ingredients:
1c granulated sugar
2 large eggs, room temperature
1-1/4c Brown Rice Flour Mix (2c brown rice flour, 2/3c potato starch, 1/3c tapioca flour)
1/4t salt
1-1/2t baking powder
1/2t xanthan gum
1/2c canola oil
1/2c milk
1t vanilla extract

Directions:
(adapted from Annalise G. Roberts, Gluten-Free Baking Classiscs)

Preheat oven to 350 degrees and line a muffin tin with 15 liners. Position oven rack in center of oven.

Beat sugar and eggs in a large bowl of an electric mixer at medium speed for 1 minute.


Add flour, salt, baking powder, xanthan gum, oil, milk, and vanilla; beat at medium speed for 1 minute.


Pour batter into muffin tins. Place in center of oven and bake for about 20 minutes or until center springs back when touched and cupcakes are very lightly browned (bake about 35 minutes for a 9-inch round, 40 minutes for 8-inch round). Cool in tins for 5 minutes and then remove from pans and cool completely on wire racks.

And now....here are some of the finished products after decorating... :)


Here's how I carry them to work. A big plastic dome goes over the top of it!! :) 


As always, if anyone has any comments or suggestions please feel free to let me know. I am not a professional baker and I don't claim to be. I make these cupcakes for my own pleasure. If you do see any typo's kindly let me know. HAPPY HALLOWEEN everyone!!!

Saturday, October 29, 2011

Devil's Food cupcakes tomorrow....stay tuned!! :)

Tomorrow I will hopefully make/upload some pictures of the Halloween cupcakes I am going to make for Monday at work. For now though, here are some pictures from last year's Halloween cupcakes.... :)